Introduction
Blightspire is a custom engine game for my 3rd year project at BUAS. It is a boomer shooter that incorporates fast paced gameplay, pixelized and grainy graphics with wave-based survival!
The project is on Steam, for both PC and Steam Deck
The code itself is also open source: here is a link to it!
Our team was composed of 9 programmers and 1 designer / producer.
What I did
Within the team, I was assigned the role of Engine Programmer.
- Integrated a scripting language
- Designed the architecture of the Engine
- Setup build system using (CMake)
- Added automated tests and linting for Pull Requests (GitHub Workflows)
- Added a Unit Testing framework (GoogleTest)
Scripting with Wren
We needed scripting language for making gameplay code, since it would allow for easier iteration times by avoiding recompilations of the engine. For that I chose a lesser know scripting language called Wren.
I chose it because:
- It has syntax similar to C, reducing the barrier of entry for my colleagues that all know C++.
- Relatively fast, on par with Lua.
- Good documentation
The main USP of scripting that I implemented was runtime reloading, since it made the experience of developing gameplay for the rest of the team much more enjoyable and responsive. All of our player movement and gun logic was implemented in Wren.
I used the wrenbind17 library for creating wren bindings for C++ since it was much easier and less error prone than the C API.
Internally, every main script represented a scene in the game: we used one for the game and one for the main menu, transitioning between both of them when necessary. Each script defined a Start, Shutdown and Update that were called when the scene/script is initialized, destroyed and every frame (respectively). Hot-reloading comes for free with this, since it is essentially the same as destroying and constructing the same script again.
class Main {
    static Start(engine) {
        // Setup input mode
        // Setup UI callbacks
        // Create player
        // Load cathedral area
        //...
    }

    static Shutdown(engine) {
        // Clear ECS
        //...
    }

    static Update(engine, dt) {
        // Update enemies
        // Player Movement
        //...
    }
}
I went with this approach since using wren as a frontend for the entire engine needed to be done earlier in development and implementing something like Unity’s C# behaviour component scripts required too much interop between wren, entt (our ECS library) and C++, as well as requiring a better engine editor.
CMake build system
To build the codebase I used CMake. To make it organized, I designed a system of handling each module of the engine as a separate library, replicating the way Unreal Engine manages its modules:
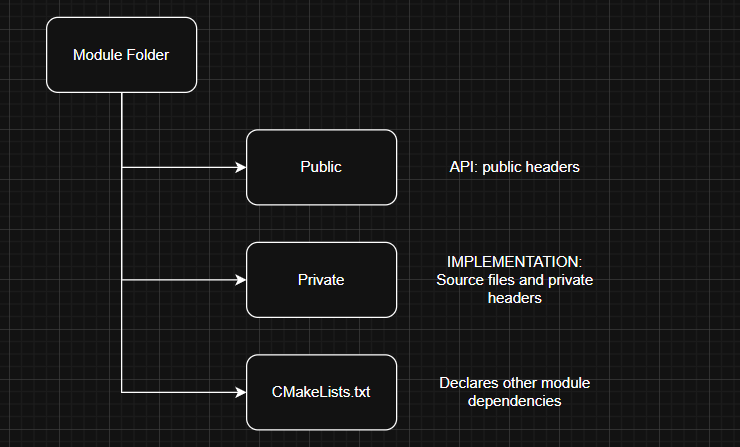
Each module has its own public and private folders, that define the visibility of files between dependent modules. This solution allows the engine to have cleanly defined dependencies between modules. I created a set of helpers for defining modules, so adding one is as easy as:
add_library(Renderer)
module_default_init(Renderer)

target_link_libraries(Renderer
    PUBLIC Core
    PUBLIC Application # other engine modules

    PUBLIC VulkanAPI # third party libraries
)
Engine module architecture
On the topic of modules, in order to add a new “manager” class to the engine, I created a very simple ModuleInterface to implement for the Renderer, Input, Audio, etc… classes.
In main, we just add all the modules we need and run the engine. The Engine class is simply a service locator for all the modules and manages their lifetime, retrieval and also update order.
int main(int argc, char* argv[])
{
    MainEngine instance;

    instance
        .AddModule<ApplicationModule>()
        .AddModule<AudioModule>()
        .AddModule<RendererModule>()
        .AddModule<GameModule>()
        // More modules here...

    return instance.Run(); // Runs event loop internally
}
This approach has it’s problems, but it is very flexible and easy to build upon. You can also easily disable certain modules in code for debugging.
GitHub Automated Testing
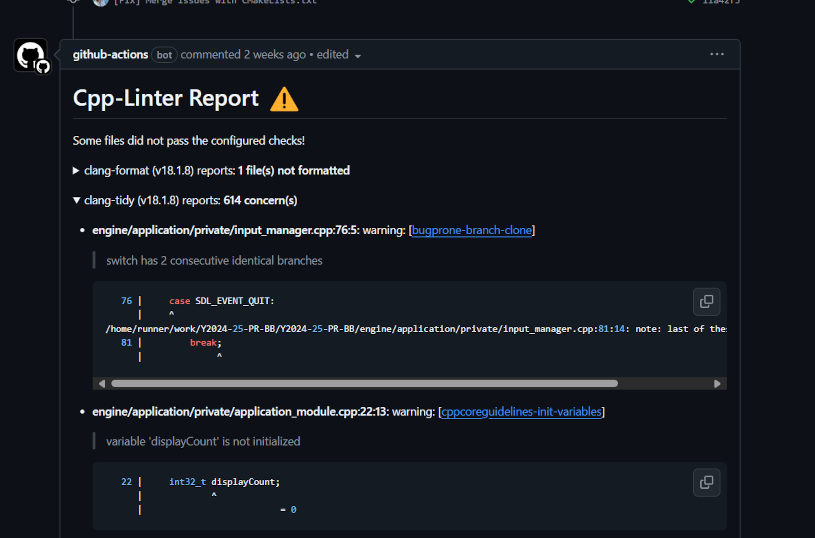
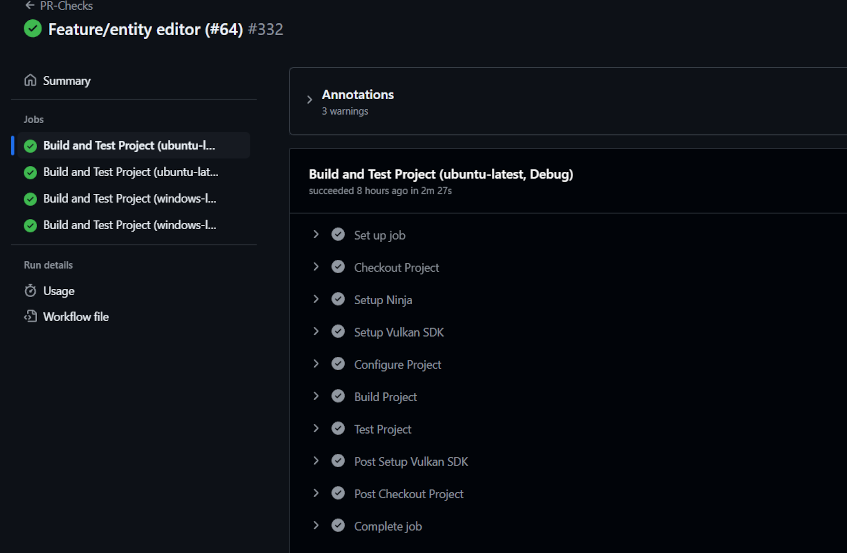
To avoid main breaking every week, I also setup some automated GitHub workflows to test building the engine on both Windows and Linux and run our unit tests, as well as another workflow for performing a linting review of a pull request: